CS PracticeWorks Software
PracticeWorks allows users to integrate their software with the Florida Probe to perform Periodontal Diagnostics. If you would like to enable your copy of PracticeWorks to integrate with the Florida Probe, please follow the directions below. For more information regarding PracticeWorks, please visit their website.
The following instructions are divided in two parts. Set-up Instructions deals with the set-up procedure to integrate Florida Probe with PW-C/I. The second section will explain how to implement the integration during an exam.
Set Up Instructions
Step 1:
Install PW-C/I.
Decide what Automation Expert Event you want to use to launch the Florida Probe Software. A likely candidate would be a user-define button called "Florida Probe".
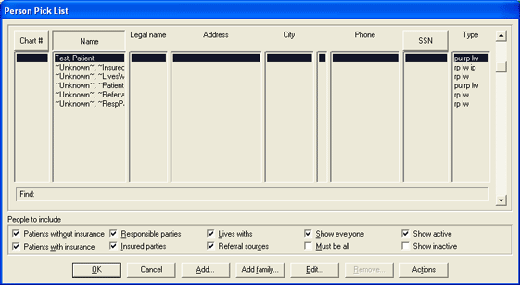
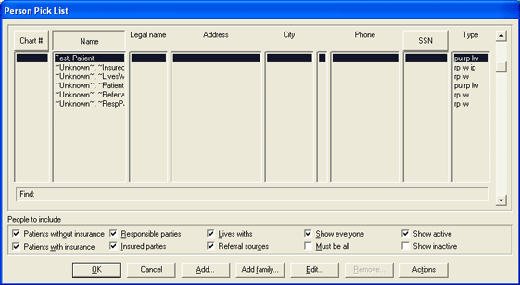
Select a Patient and double-click his name.
Step 2:
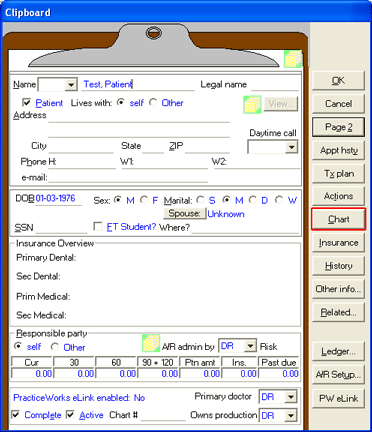
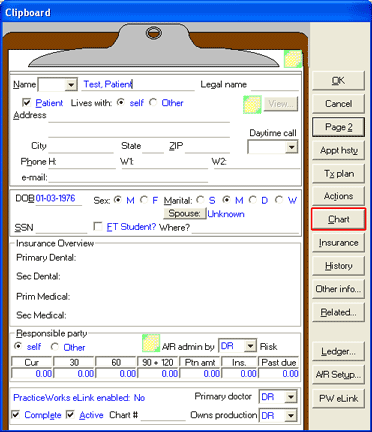
Click the "Chart" button.
Install:
Step 3:
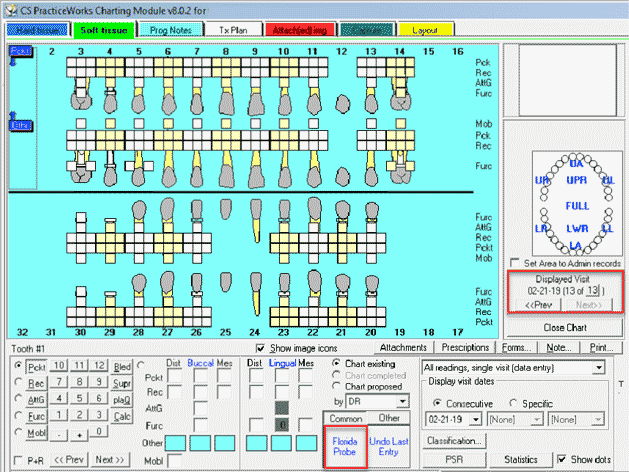
Click the Soft-Tissue Tab.
Make sure "Displayed Visit" date is for today.
Right click the space for the user-defined button.
Step 4:
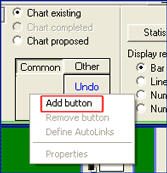
Select "Add button".
Step 5:
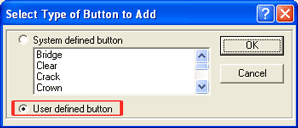
Select the type of button to Add.
Make sure to select "User defined button".
Step 6:
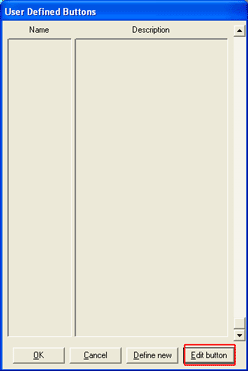
Click "Edit Button".
Step 7:
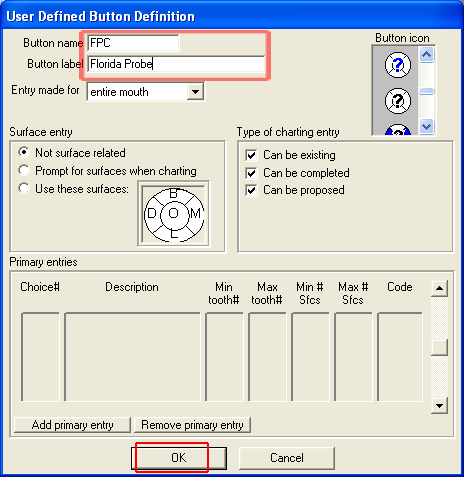
Enter the name of the button and the label.
You may also select an icon to be displayed.
Click OK.
Step 8:
You will be taken back to the Soft Tissue Chart section.
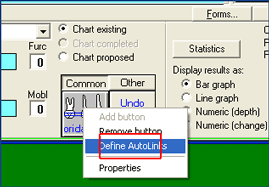
Right click on the user-defined button.
Select "Define Autolinks".
Step 9:
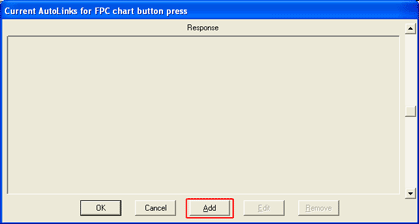
AutoLinks dialog box appears.
Click "Add".
Step 10:
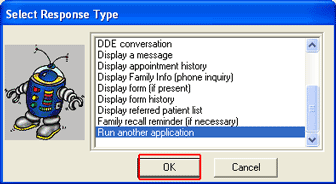
Scroll down and select "Run another application".
Click OK.
Step 11:
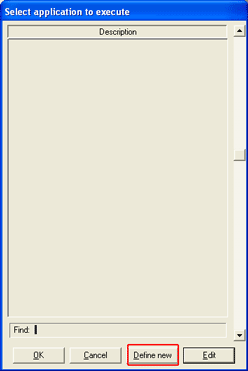
Click on "Define new".
Step 12:
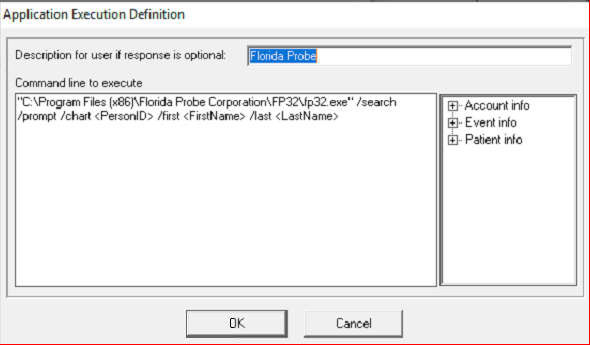
Enter a description of the button.
In the "command line to execute" field, enter the following:
"C:\Program Files (x86)\Florida Probe Corporation\FP32\FP32.exe" /search /chart <PersonID> /first <FirstName> /last <LastName>
*Note that you want to type the quotation marks.
You use the <PersonID> after the "/chart" parameter because that's a unique number in PW-C/I, and that's number that the Florida Probe software will use to select the correct patient. The PW-C/I chart number is not necessarily, and therefore should not be used for this.
Click OK.
Step 13:
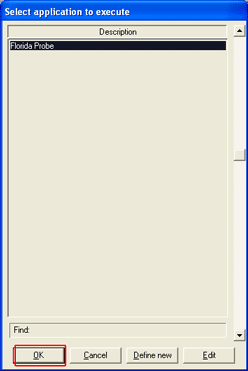
You return to the "Select application to execute" window, with Florida Probe highlighted.
Select the Florida Probe from the list.
Step 14:
A question appears about waiting for the application to finish before continuing.
Click No.
Note: This will allow you to switch back into PW-C/I while the Florida Probe software remains running.

Step 15:
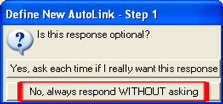
A question is displayed about this response being optional.
Click "No, always respond WITHOUT asking"
Since this is the only purpose of this button, there is no reason to ask what you want to do when you click on it.
Step 16:
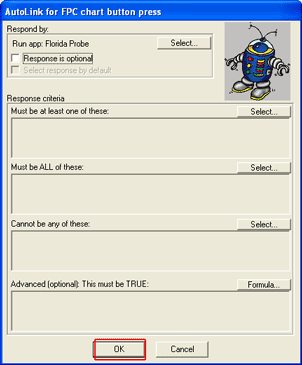
The Autolink for the Florida Probe window is displayed.
Click OK and the No Context Selected window is displayed.
Step 17:
Click Yes.
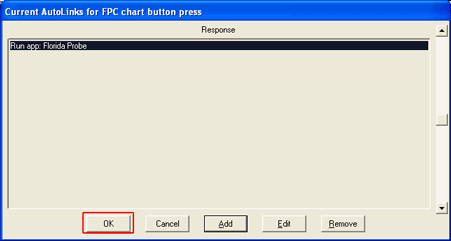
You want to execute this Response (Florida Probe) for every patient, regardless of the context. You return to the Current Autolinks for Florida Probe button event window, with this new Autolink shown as "Run app:Florida Probe".

Step 18:
Click OK to close the list of Autolinks. Since the Florida Probe Response has now been created, you can Autolink to it from any Automation Expert Event in PracticeWorks (Office, Charting and Integration).
You are now ready to implement the Florida Probe Integration.
Florida Probe Integration Implementation
Step 1:
Start PracticeWorks as usual and select a patient.
Step 2:
Click "Chart".
Step 3:
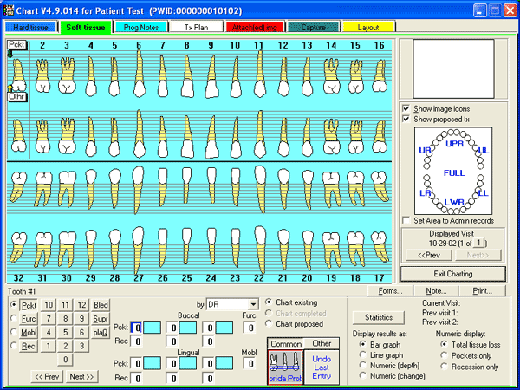
Select the Soft tissue tab.
Click the Florida Probe user-defined button.
Step 4:
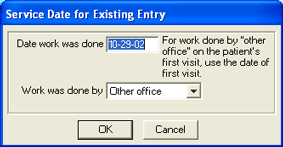
Make sure you enter the correct date.
Click OK.
Step 5:
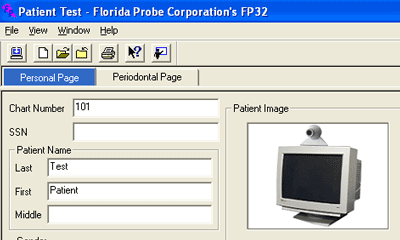
Florida Probe will now start. Notice the chart number and patient name will be automatically filled out by the procedure.
You may now start the exam.
|